In this article we will split a file into many different subsets and save each subset to the directory of your choice. This is a reasonably common task in industry and if it is still being done manually this process may save some time. This article will streamline the process so files can be saved automatically based on a set of criteria.
The file will do the manual tasks automatically using the auto-filter and save each subset to a fresh file. For this example we will filter by region there are 5 regions:
Africa
AsiaPac
Europe
NthAmerica
SthAmerica
The raw data has these regions in a single column and the code will cycle through each region and filter by region, copy the data, create a new file, paste the data, paste the format, then save and close the file while starting the process again.
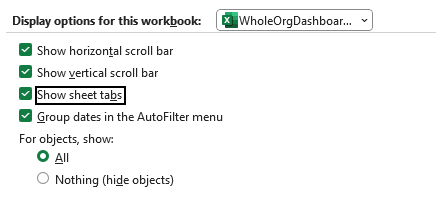
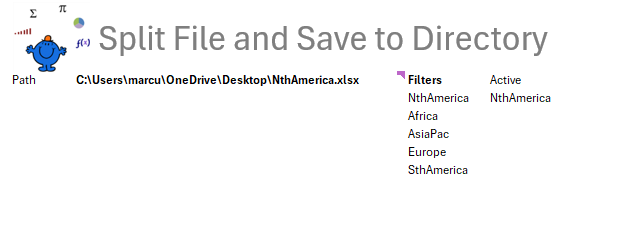
In the attached file there is a control tab. In this tab three things are important. The file path, the filter criteria and the active filter. The active filter will form the name of the file in the file path.
You can see the path below the filters are in a list and the active filter is in the column titled Active.
The following is the entire code. In the next section I will explain what each part does.
Option Explicit

Sub OpenExp() 'Excel VBA to save date to a specific location.
Dim owb As Workbook
Dim sh As Worksheet
Dim ws As Worksheet
Dim i As Integer
Dim n As Integer
Dim lr As Long

    Set sh = Sheet1 'This is the 'Data' tab
    Set ws = Sheet2 ' This is the control tab
    n = 5 ' the loop will start in row 5
    lr = sh.Range("A" & Rows.Count).End(xlUp).Row 'Last row start of process
    Application.ScreenUpdating = False 'screen update - flicker off.

    For i = 1 To 5 'Five regions
        sh.AutoFilterMode = False 'Start by turning filter off
        ws.[E6] = ws.Range("D" & i + n)
        sh.Range("A2:Q" & lr).AutoFilter 8, ws.Range("D" & i + n) '8th Column
        lr = sh.Range("A" & Rows.Count).End(xlUp).Row 'check last row after filter is on

        If lr > 1 Then 'Only move data if it is in the filter.
            sh.Range("A1:Q" & lr).Copy 'Copy relevant data.
            Set owb = Workbooks.Add 'Add new workbook
            owb.Sheets(1).[A1].PasteSpecial xlPasteValues 'Paste just values
            owb.Sheets(1).[A1].PasteSpecial xlPasteFormats 'Paste just formats
            owb.SaveAs ws.Range("Path").Value 'Save file
            owb.Close False 'Close don't save a second time
        End If
    Next i

    sh.AutoFilterMode = False 'filters all off
    Application.ScreenUpdating = True 'updating back on
End Sub
What is Happening
This section will deal with how you might look to adjust the code to your needs. Obviously the path needs to be adjusted. There is a named range called Path. Change the path you want the file to be saved to but be aware of the flexible nature of the path.
="C:\Users\marcu\OneDrive\Desktop\"&E6&".xlsx"
The formula is above and it is recommended that this part is changed and the rest left as is.
C:\Users\marcu\OneDrive\Desktop\
Worksheet Referencing
The worksheet code name for the Data tab and Control tab are as follows
Data tab = Sheet1
Control tab = Sheet2
These are variables Set sh = Sheet1 where sh will be equal to the data tab and ws will be equal to the control tab Set ws = Sheet2.
The List Length - Manual
n = 5 this is the amount of regions that will be cycled through. See list above. It might be worth noting you can count the list and use it as a variable if you expect the list to change on regular basis.
Checking the Last Row at the Start
It is important to trap the last used row a couple of time in the process, both before and after the filter. The reason we trap the last row after the filter is to determine if the filter is null. If the filter is null then we don’t want to continue with the procedure and we will move to the next procedure.
The Looping Construct
This is where the fun begins. A loop is created to cycle through each of the regions. For this process a basic 1 to 5 loop is set up.
For i = 1 to 5
This is where you put the code you want to repeat.
Next i
Above is an example of a 1 to 5 loop where you can change the start or ending point. It is super handy for this type of procedure because it allows us to run 5 identical processes and all automatically. No errors from repetition fatigue. The identical procedure in this case is applying a filter, copying the data within that filter and saving it to our directory, then starting again.
Doing the Admin
Inside the loop at the start we want to make sure the filters are set to off. The following lines will turn the filters off and make E6 equal to the active region. As the loop progresses it will add a new value to cell E6.
sh.AutoFilterMode = False 'Start by turning filter off
ws.[E6] = ws.Range("D" & i + n)
Adding the Filter
The autofilter is now ready to be engaged. The filter is added to the 8th column and the criteria is in the control tab in column D from D6 to D11.
sh.Range("A2:Q" & lr).AutoFilter 8, ws.Range("D" & i + n) '8th Column
The line above will filter the Data tab by one region.
After the filter is added there is a check for the last row (Lr).
The IF Statement.
In some instances the results of the filter may be blank. When this is the case we want to do nothing. To do this we trap the last row after the filter is applied. If the last used row is greater than 1 then we know that the data is populated and we want to copy it to a fresh workbook and save it.
IF lr > 1
If the last row (lr) is greater than 1 then - perform a task. Otherwise do nothing.
The process then copies the data, opens a new instance of a workbook.
Set owb = Workbooks.Add
The above lines sets owb as the new workbook. The term owb is a variable to use for reference purposes. Now when referring to the new workbook we use owb.
Paste the Values and Formats
Next task is to paste the filtered data to the new workbook. While there are a number of ways to do this. We will paste the values and the formats. The following two lines paste values and formats.
owb.Sheets(1).[A1].PasteSpecial xlPasteValues
owb.Sheets(1).[A1].PasteSpecial xlPasteFormats
Save and Close
The following two lines will save the file to the specified directory and close the file.
owb.SaveAs ws.Range("Path").Value 'Save file
owb.Close False 'Close don't save a second time
Once these final tasks are complete the loop will start again with the next region till all the regions have been saved to the directory. The code will go out of the loop and end after this point.
The following is an example workbook to help consolidate the above technique.